
Everything You Need to Know About High-Performance Audio for Stage and Events
Achieving incredible sound for your live events or stage performances is absolutely crucial. It's the vital element that ensures every word is heard clearly and every note resonates with the audience, whether it's a band delivering a high-energy set or a keynote speaker sharing an important message. I'm thrilled to guide you through everything we've learned about high-performance audio for stages and events.
From intimate school plays to massive concert stages, the right audio setup can truly make or break the entire experience. In this comprehensive guide, we'll explore the inner workings of professional audio systems and show you how to achieve the best possible sound for any scenario.
Have you ever attended an event where the sound was so perfect it seemed effortless? That's the gold standard we're aiming for. We will walk you through the essential components of a powerful PA system, explain how to set it up effectively, and share expert tips to ensure your audience enjoys crystal-clear, impactful sound every single time.
Unpacking the Essentials: Your High-Performance Audio System Components
A high-performance audio system is more than just a set of speakers. It's a carefully selected ecosystem of components working in harmony to capture, process, and amplify sound. Understanding each part's role is the first step toward mastering event audio. From the microphone that captures the initial performance to the speakers that deliver it to the audience, every piece is critical.
Microphones: Your Voice to the World
The microphone is the very beginning of your sound chain, converting acoustic sound into an electrical signal. The quality of this initial capture affects everything that follows, making the choice of microphone a pivotal decision for any live performance or event.
Wired vs. Wireless: Choosing What's Right for Your Performers
The choice between a wired and a wireless microphone is one of the most fundamental decisions in setting up live audio. Each has distinct advantages and is suited for different scenarios, performers, and environments.
Wired Microphones: The Standard for Reliability For decades, wired microphones have been the trusted choice for live shows, studio recordings, and public speaking due to their simplicity and dependability. Their biggest advantage is the direct physical connection to the sound system, which provides a stable, clear signal with virtually no risk of interference or dropouts. This makes them ideal for situations where audio integrity is paramount, such as at a stationary podium, for a panel discussion, or for miking instruments like a drum kit or guitar amplifier.
Key benefits of wired microphones include:
- Unmatched Reliability: The direct cable connection means no signal dropouts or interference from other radio frequency (RF) devices.
- Superior Audio Fidelity: Many audio purists prefer wired mics because the signal travels directly through the cable, eliminating the need for compression or digital conversion that can sometimes color the sound in wireless systems.
- No Battery Concerns: A significant advantage is that they don't require batteries, removing the stress of a microphone dying mid-performance.
- Cost-Effectiveness: Wired microphones are generally more affordable than their wireless counterparts, making them a great option for venues, artists, or event organizers on a budget.
The primary drawback is, of course, the cable itself. It limits the performer's movement and can create a cluttered, sometimes hazardous, stage environment.
Wireless Microphones: The Freedom to Perform Wireless microphones have revolutionized live performance by cutting the cord. The most obvious benefit is the complete freedom of movement they offer. This allows dynamic singers, keynote speakers, and theater performers to move across the stage, interact with the audience, and deliver a more engaging performance without being tethered to a single spot.
Key benefits of wireless microphones include:
- Enhanced Mobility: Performers are not restricted by cable length, allowing for more dynamic and interactive stage presence.
- Clean Aesthetics: A stage without visible cables looks more professional and reduces tripping hazards for performers and crew.
- Flexibility and Quick Setup: Wireless systems can be easy to set up and are highly adaptable for different event types, from concerts to corporate presentations.
However, this freedom comes with its own set of considerations. Wireless systems are susceptible to RF interference, though modern digital systems have become increasingly reliable at mitigating this issue. They also rely on batteries, which requires careful management to avoid power loss during a critical moment. Finally, high-quality wireless systems represent a more significant financial investment than their wired equivalents.
| Feature | Wired Microphones | Wireless Microphones |
|---|---|---|
| Mobility | Limited by cable length | Excellent, allows free movement |
| Reliability | Extremely high; no signal dropouts | Good, but potential for RF interference and battery failure |
| Audio Quality | Often considered the benchmark for pure, uncompressed signal | Modern systems offer excellent, near-wired quality |
| Cost | More affordable | Higher initial investment |
| Setup | Simple plug-and-play | Requires frequency coordination and battery management |
| Best For | Stationary performers (drummers, keyboardists), podiums, studio recording, budget-conscious setups | Energetic vocalists, public speakers, theater, large stages |
Ultimately, the best choice depends on the specific needs of the event. For a stationary speaker at a conference, a reliable wired lectern mic is perfect. For a high-energy rock concert, a robust wireless system is indispensable. Many professional productions use a hybrid approach, combining the reliability of wired mics for some elements with the flexibility of wireless for others.

Dynamic vs. Condenser: Capturing Every Nuance
Beyond the wired vs. wireless debate lies another critical distinction: the technology inside the microphone. The two most common types used in live sound are dynamic and condenser microphones. They work differently, excel in different areas, and understanding their characteristics is key to choosing the right tool for the job.
Dynamic Microphones: The Rugged Workhorse Dynamic microphones are the titans of the live sound world, renowned for their durability and ability to handle high sound pressure levels (SPL). They operate on a simple and robust electromagnetic principle: sound waves cause a diaphragm attached to a wire coil to move within a magnetic field, generating an electrical signal. This process is essentially the reverse of how a loudspeaker works.
Because of their construction, dynamic mics are:
- Extremely Durable: They can withstand the rigors of touring, including drops and rough handling, which is why they are a staple on every stage.
- Excellent with Loud Sources: Their ability to handle high SPL without distorting makes them the go-to choice for close-miking loud sources like snare drums, guitar cabinets, and powerful rock vocalists.
- Less Sensitive: They are generally less sensitive to quiet sounds and ambient noise, which is a major advantage on a loud stage. This helps to isolate the intended sound source and reduce bleed from other instruments.
- No External Power Needed: Dynamic mics are passive, meaning they don't require an external power source like phantom power to operate.
Their focused, robust nature makes them ideal for most live vocal applications and for capturing loud, punchy instruments.
Condenser Microphones: The Detail-Oriented Artist Condenser microphones work on a different principle, using a capacitor (or "condenser") to convert sound. A thin, conductive diaphragm is stretched in front of a charged backplate. Sound waves cause the diaphragm to vibrate, changing the distance between it and the backplate, which alters the capacitance and creates an electrical signal.
This design makes condenser mics:
- Highly Sensitive: They are far more sensitive than dynamic mics and can capture subtle nuances, delicate details, and a wider range of frequencies. This makes them excel at reproducing the crisp detail of acoustic instruments, the shimmer of cymbals, or the breathy texture of a ballad vocal.
- Require External Power: Because of their active internal electronics, condenser microphones need a power source to function. This is typically provided by "phantom power" (+48V), a DC voltage sent from the mixing console through the XLR cable.
- More Fragile: Their delicate internal construction means they are more susceptible to damage from rough handling and extreme SPLs compared to dynamic mics.
While traditionally seen as studio microphones, specially designed live condenser mics are increasingly popular. They are often used for applications where detail is critical, such as for drum overheads, acoustic guitars, pianos, and for vocalists in controlled environments who want to capture every nuance of their performance. However, their high sensitivity can be a double-edged sword on stage, as they are more prone to feedback and picking up unwanted stage noise if not used carefully.
Key Differences at a Glance:
| Feature | Dynamic Microphone | Condenser Microphone |
|---|---|---|
| Principle | Electromagnetic Induction | Variable Capacitance |
| Durability | Very rugged and durable | More delicate |
| Sensitivity | Lower sensitivity, good for loud sounds | Higher sensitivity, captures fine details |
| Power | Passive (no external power needed) | Active (requires phantom power) |
| Common Use | Live vocals, guitar amps, drums | Studio vocals, acoustic instruments, drum overheads |
| Feedback | Generally more resistant to feedback | Can be more prone to feedback |
In practice, a full stage setup will often use both types: durable dynamic mics for the high-impact sources and sensitive condenser mics for the elements that require detailed reproduction.
Mixing Consoles: The Brains Behind the Sound
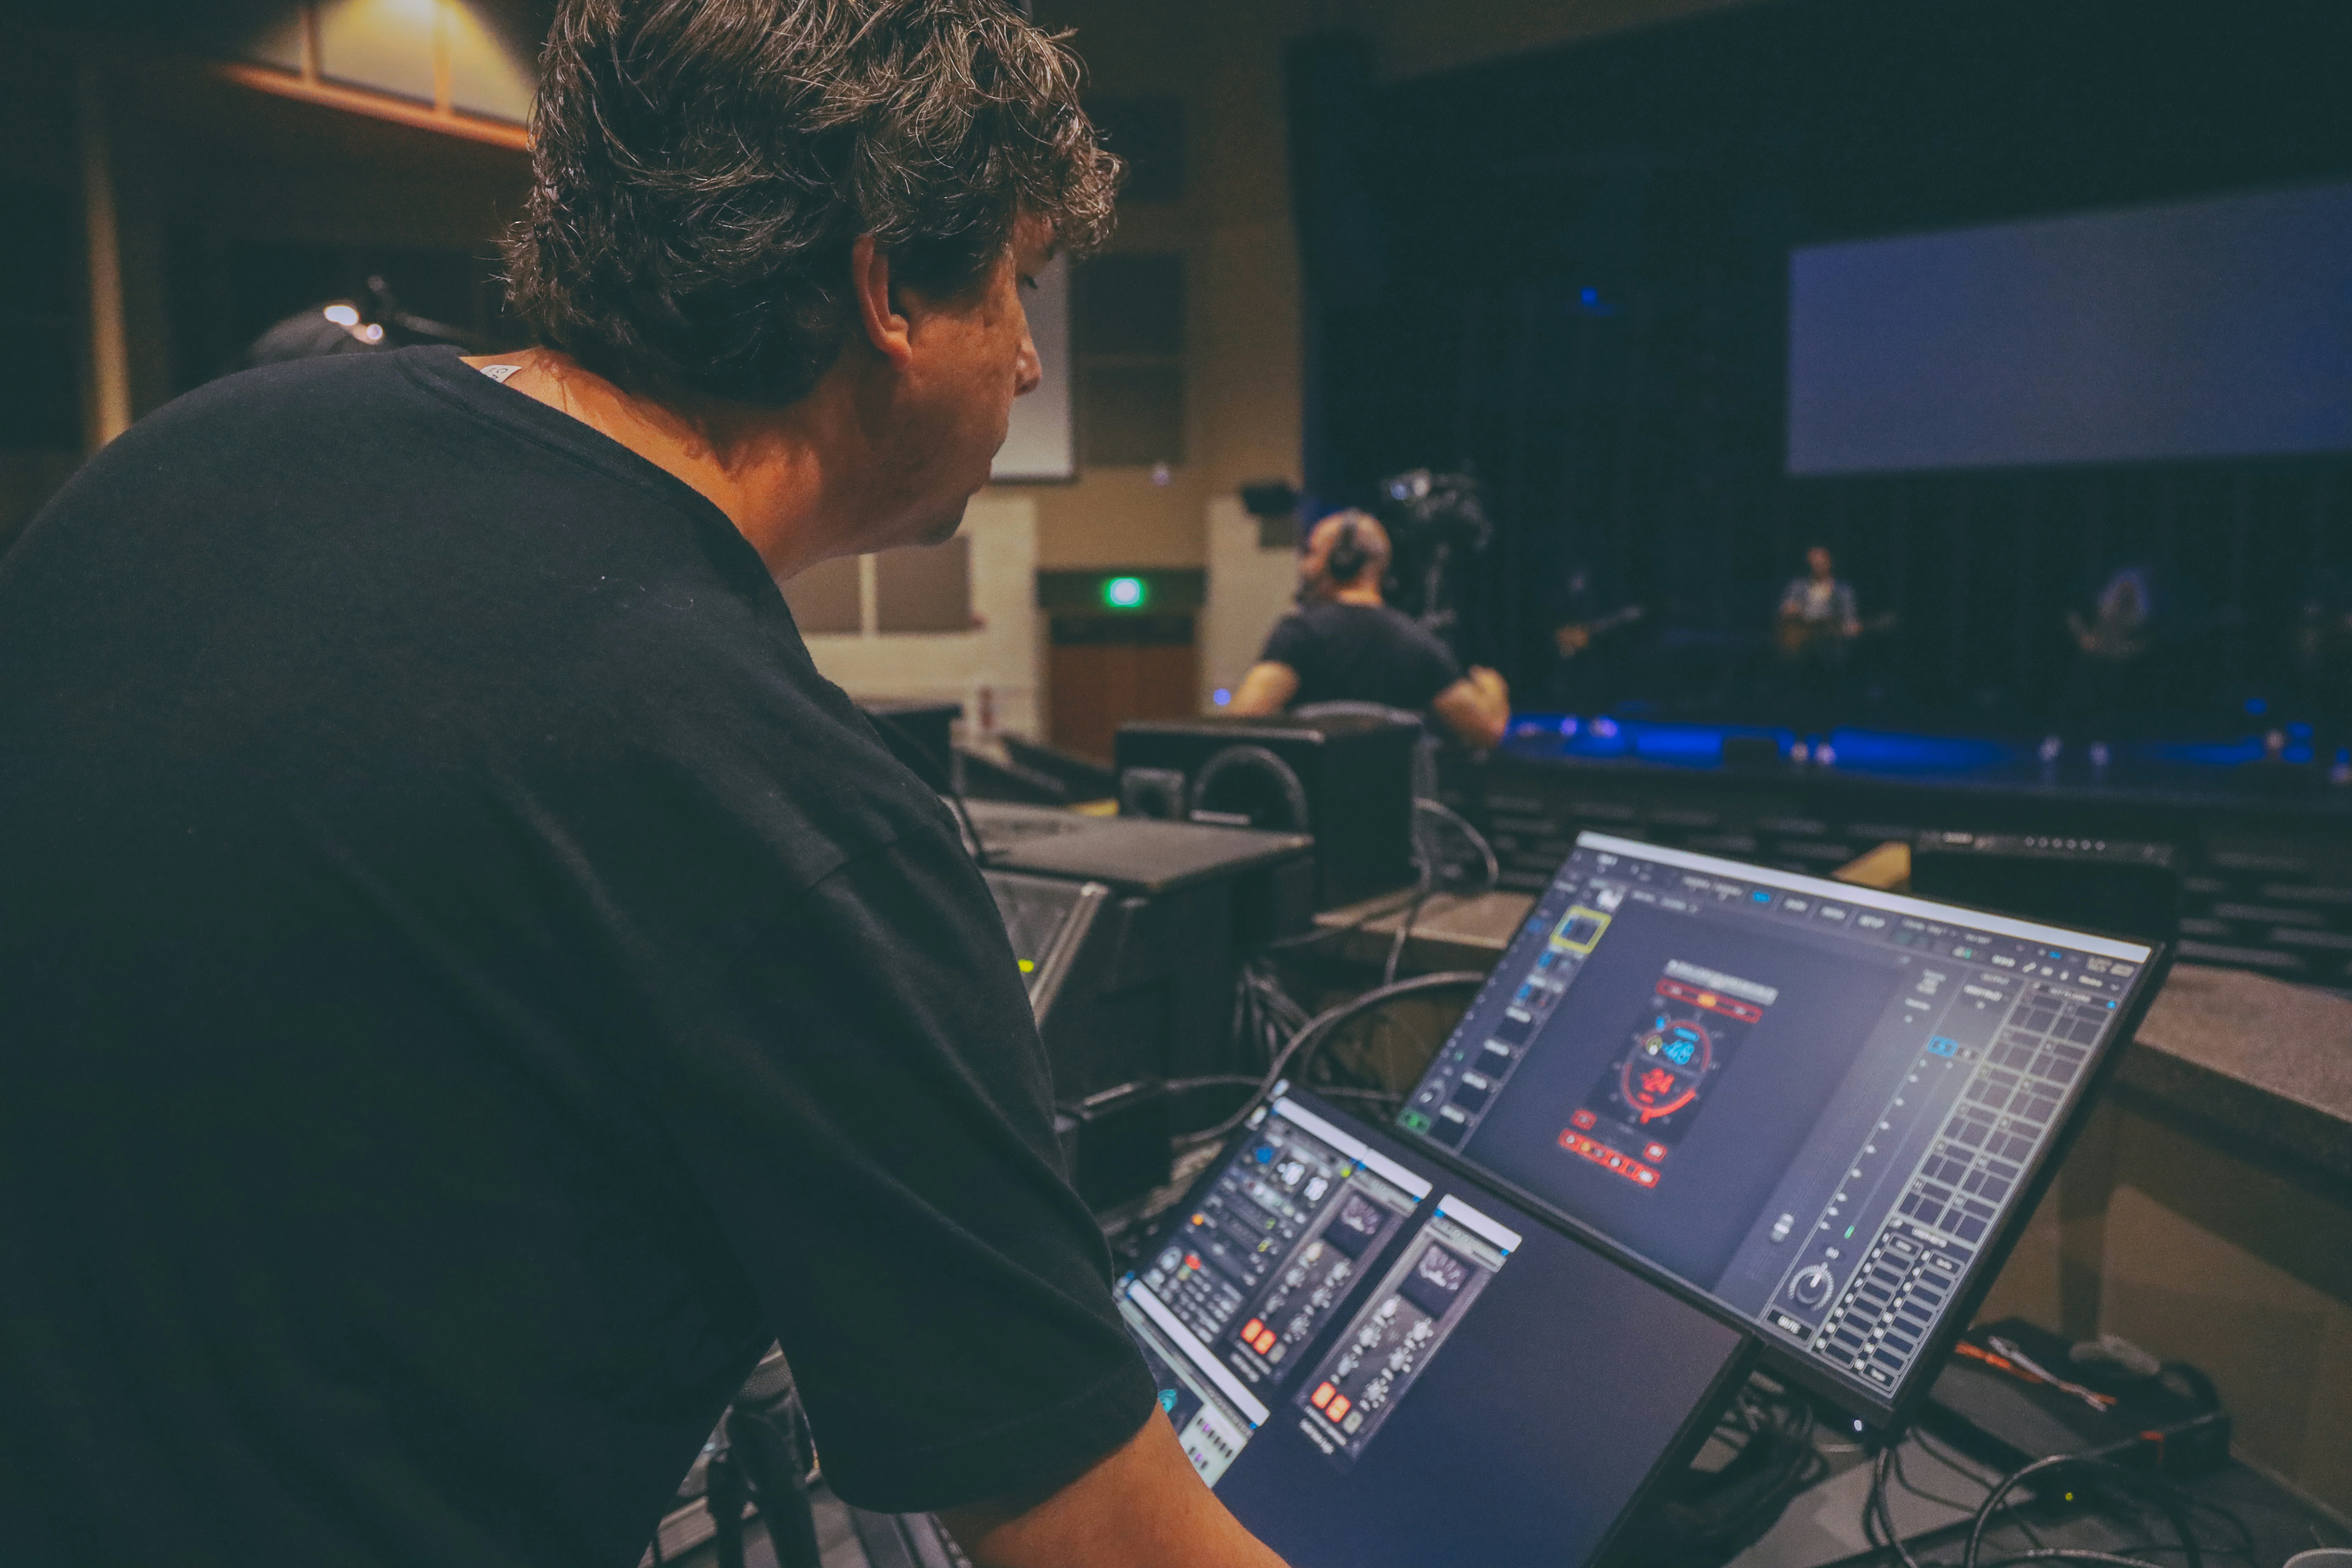
If microphones are the ears of your audio system, the mixing console is the brain. It's the central hub where all audio signals converge to be balanced, shaped, and routed. Here, the sound engineer artfully blends individual tracks—vocals, guitars, drums, keyboards—into a cohesive and powerful final mix that the audience hears. The mixer gives you control over volume levels, tone (EQ), dynamics, and effects for each input channel.
Analog vs. Digital: Finding Your Perfect Control Style
The choice between an analog and a digital mixing console is a significant one, influencing not just the sound but the entire workflow of an event. Both have dedicated followings and distinct advantages.
Analog Mixers: Tactile and Immediate
Analog mixers are the classic choice, celebrated for their straightforward, hands-on control. Every function has a dedicated physical knob, fader, or button. This "what you see is what you get" interface allows for incredibly fast, intuitive adjustments—a major plus in the dynamic environment of a live show.
- Workflow: The one-knob-per-function design means there are no menus to navigate. If you need to adjust an EQ or an aux send, you simply reach for the physical control. This immediacy is prized by many engineers who need to make split-second decisions.
- Sound: Analog consoles are often described as having a "warm" or "musical" sound. This character comes from the subtle harmonic distortion and coloration introduced by their electronic components. While technically a form of imperfection, this sound is highly desirable in many genres.
- Simplicity and Reliability: With no software to crash or firmware to update, analog mixers are often seen as more reliable in a fundamental sense. As long as they have power, they work. They are also generally more affordable at the entry-level.
The main limitations of analog mixers are their size, lack of advanced features, and inflexibility. Adding effects like reverb or compression requires external rack-mounted gear, which adds cost, weight, and complexity to the setup.
Digital Mixers: Powerful and Flexible
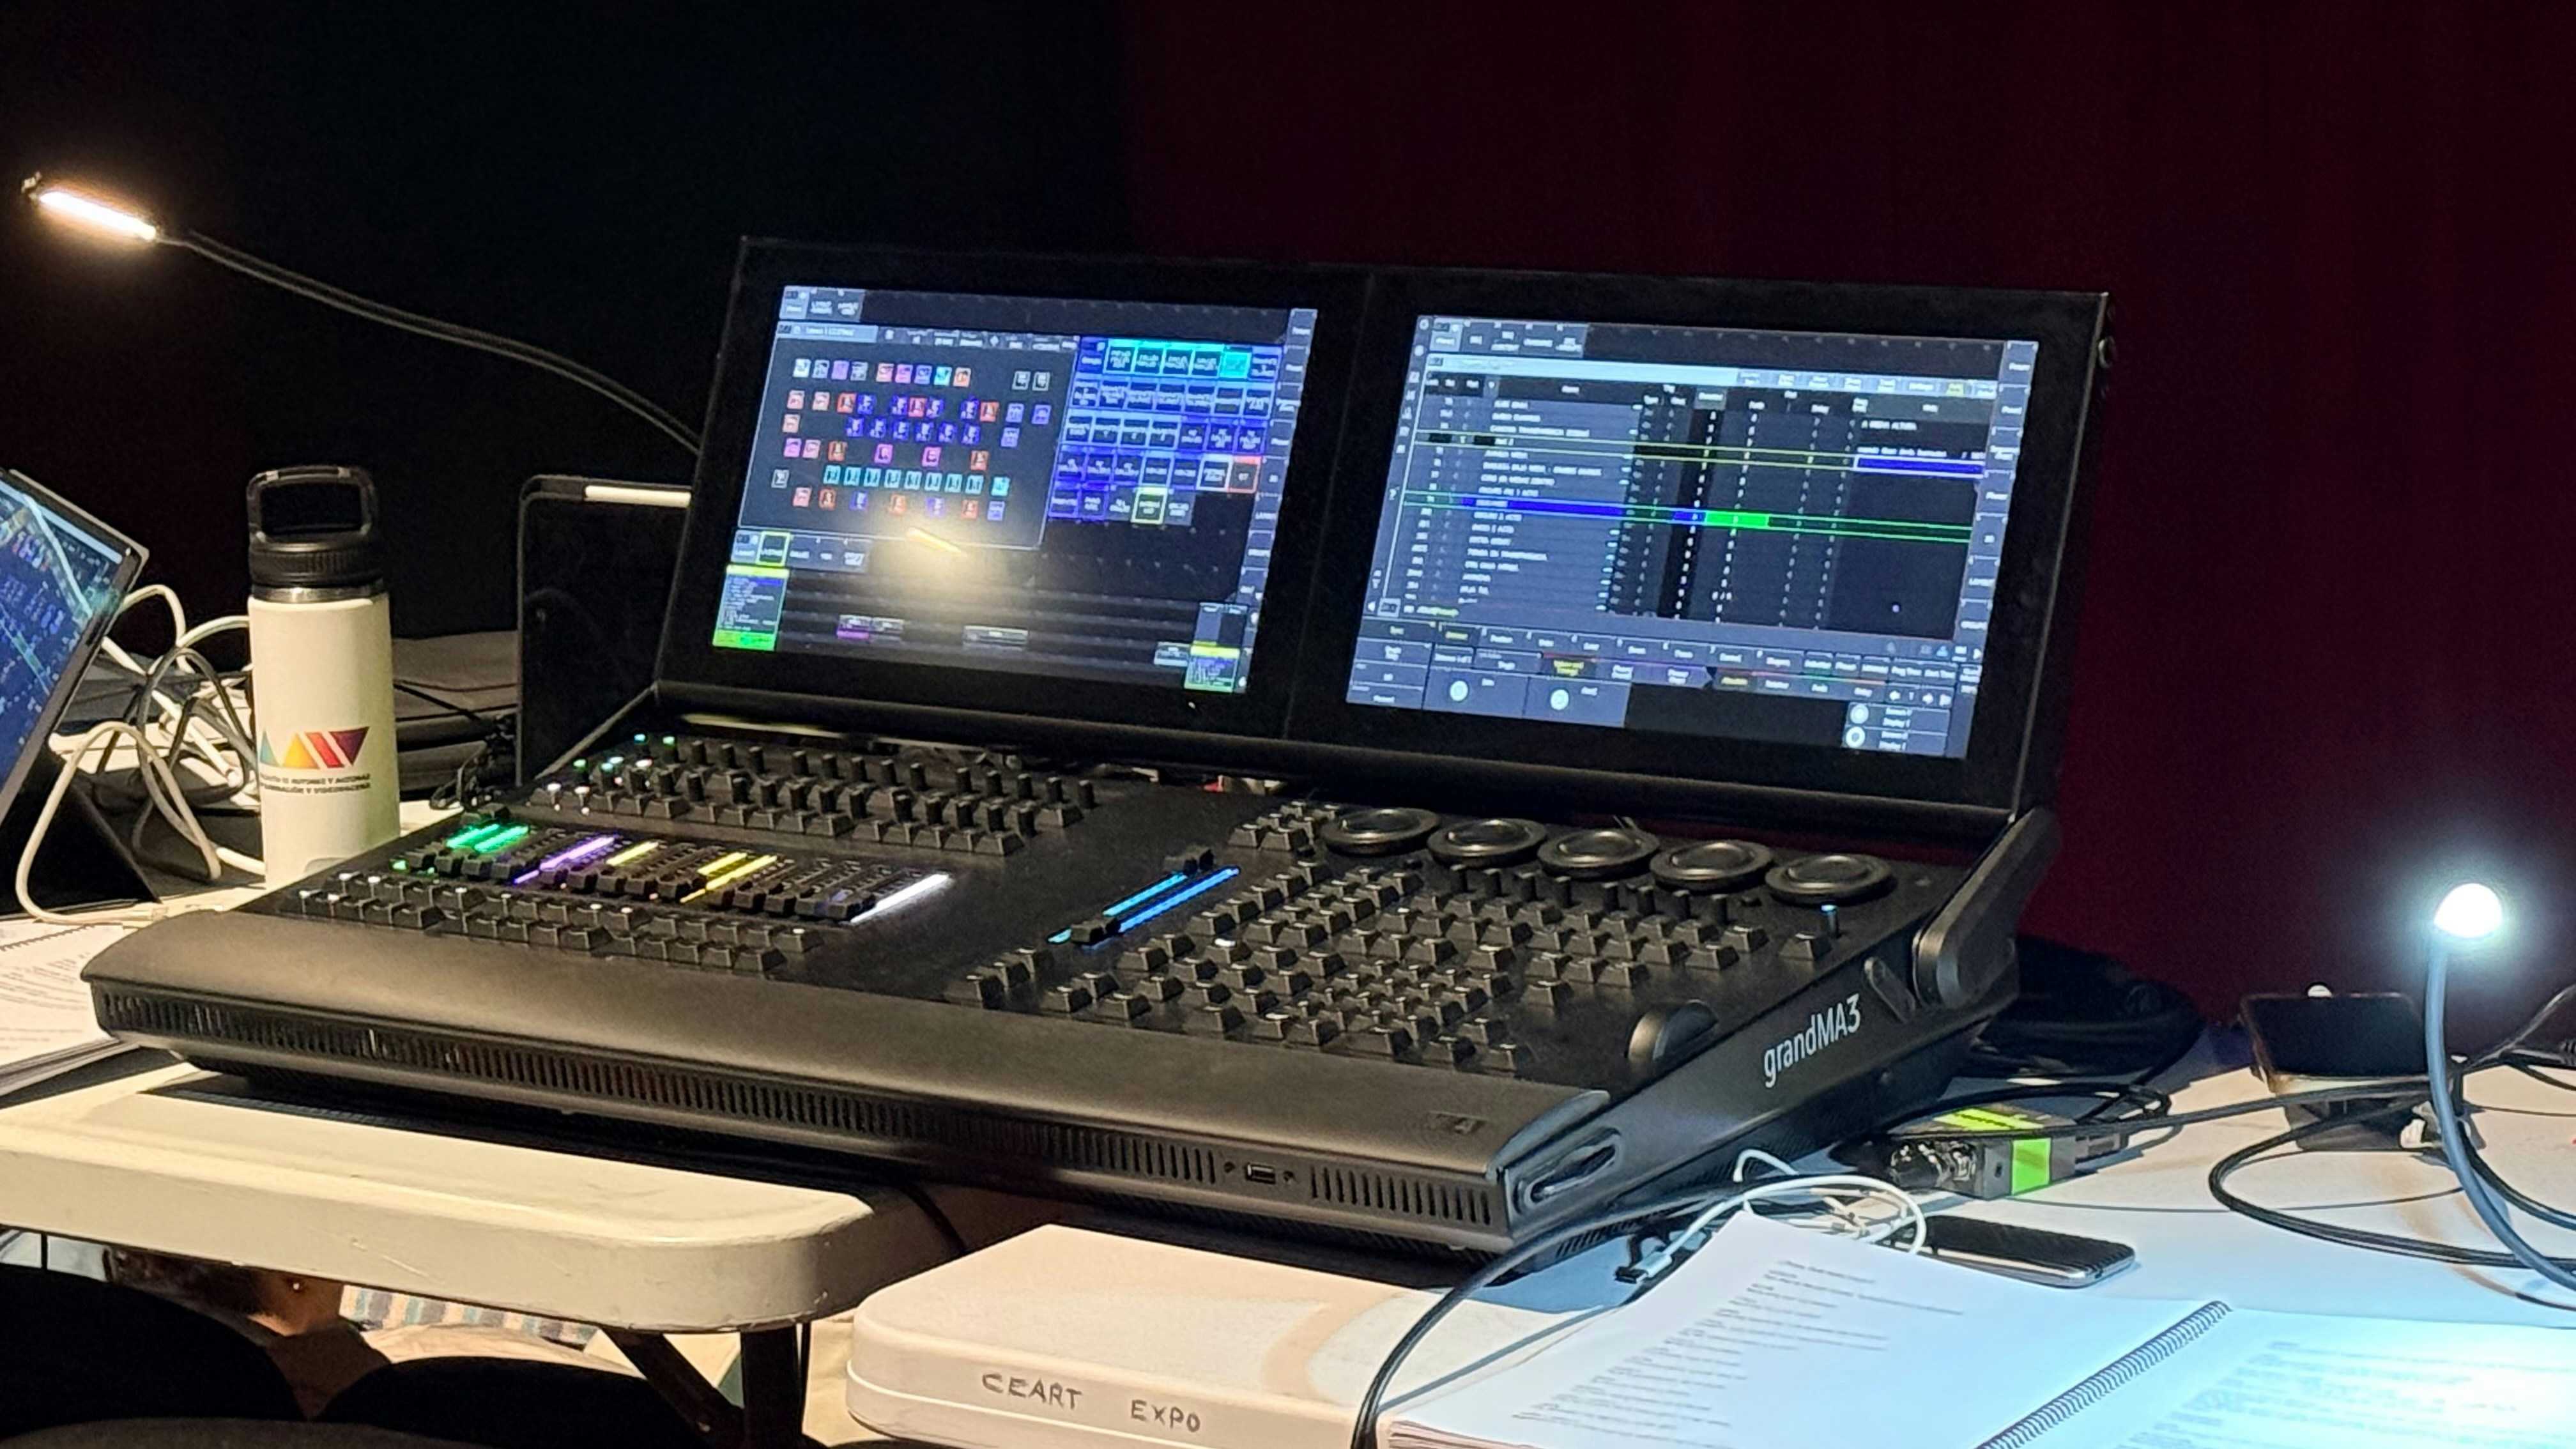
Digital mixers have become the industry standard for most large-scale events, and for good reason. They convert incoming analog audio signals into digital information, process them using powerful internal computers (DSPs), and then convert them back to analog for output to the amplifiers and speakers.
This digital workflow unlocks a massive range of benefits:
- Integrated Effects and Processing: A single digital mixer can replace an entire rack of outboard gear. High-quality EQs, compressors, gates, reverbs, delays, and more are all built-in, available on every channel.
- Scene Recall: Perhaps the biggest advantage for live events is the ability to save and recall entire console setups. An engineer can pre-program settings for different bands, different songs, or different speakers and recall them instantly with the press of a button. This is a game-changer for festivals or corporate events with multiple presenters.
- Remote Control: Most modern digital mixers can be controlled wirelessly via a tablet or laptop. This allows the engineer to walk around the venue and adjust the mix from the audience's perspective, ensuring the best possible sound throughout the space.
- Compact Footprint: By using layers and screens, digital mixers can control a huge number of channels from a relatively small physical surface. Motorized faders can be assigned to different banks of channels, making the console incredibly powerful for its size.
The learning curve for digital mixers can be steeper, as engineers need to be comfortable navigating menus and software interfaces. However, the incredible flexibility, power, and convenience they offer have made them an indispensable tool for modern high-performance audio.
Here's a comparison:
| Feature | Analog Mixer | Digital Mixer |
|---|---|---|
| Workflow | Tactile, one-knob-per-function | Menu-driven, layered, highly flexible |
| Sound | "Warm," colored by circuitry | Clean, precise, and transparent |
| Features | Basic; requires external processors | Extensive built-in effects, EQ, dynamics |
| Recall | Manual, via physical setting | Full scene recall and automation |
| Size | Large and heavy for high channel counts | Compact and powerful |
| Cost | Generally more affordable at entry level | Higher initial cost, but can replace costly outboard gear |
Power Amplifiers: The Muscle for High-Performance Audio
After the sound has been captured by microphones and shaped by the mixing console, it needs to be made loud enough for the entire audience to hear. This is the job of the power amplifier. It takes the low-level "line" signal from the mixer and boosts it with enough power to drive the large magnets in the loudspeakers, creating the sound waves that travel through the venue. A reliable, powerful, and clean-sounding amplifier is the engine of your PA system. When considering amplification, products like Sinbosen power amplifiers are designed to deliver the necessary muscle for professional stage events, ensuring clarity and impact.
Class D Technology: Efficient Power for Your Events
In the world of power amplifiers, one technology has become dominant for live sound applications: Class D. Despite the name, "D" does not stand for digital. A Class D amplifier is a type of switching amplifier that is renowned for its incredible efficiency.
Unlike traditional linear amplifiers (like Class A or AB) where the output transistors are always partially on and generating significant heat, the transistors in a Class D amplifier act like rapid switches. They are either fully on or fully off, a state in which they dissipate very little power as heat. They use a technique called Pulse Width Modulation (PWM) to convert the analog audio signal into a series of high-frequency pulses. The width of these pulses corresponds to the amplitude of the audio signal. This highly amplified pulse train is then smoothed out by a low-pass filter to reconstruct the powerful analog audio signal that drives the speakers.
The primary benefits of this technology for stage and event audio are immense:
- High Efficiency: Class D amplifiers can achieve efficiencies of 90% or higher, whereas traditional Class AB amplifiers often struggle to surpass 60%. This means far less electrical energy is wasted as heat.
- Reduced Heat: Because they are so efficient, Class D amps run much cooler than their linear counterparts. This eliminates the need for massive, heavy heat sinks and large cooling fans, though some cooling is still necessary for high-power models.
- Lighter Weight and Smaller Size: The reduced need for large transformers and heat sinks allows Class D amplifiers to be incredibly compact and lightweight. An amplifier delivering thousands of watts can be built into a small 1U rack-mountable chassis. This is a massive advantage for touring rigs and portable PA systems.
- Lower Power Consumption: High efficiency translates directly to lower power draw from the wall. This can be a critical advantage at large festivals or events where power resources are limited.
Modern Class D amplifiers, such as the D-Series from manufacturers like Sinbosen, deliver not only exceptional power and efficiency but also outstanding audio quality that rivals and often exceeds older designs. Their compact, lightweight, and powerful nature has made them the go-to choice for powering everything from subwoofers to full-range line array systems in professional audio.
Speakers: Making Sure Everyone Hears Every Note
Speakers, or loudspeakers, are the final component in the audio chain. They are transducers that perform the opposite function of a microphone: they convert the amplified electrical signal back into acoustic energy, or sound waves. The type, number, and placement of speakers are all critical factors in designing a system that delivers clear, consistent, and powerful sound to every member of the audience.
Main PA Speakers: Covering Your Entire Audience
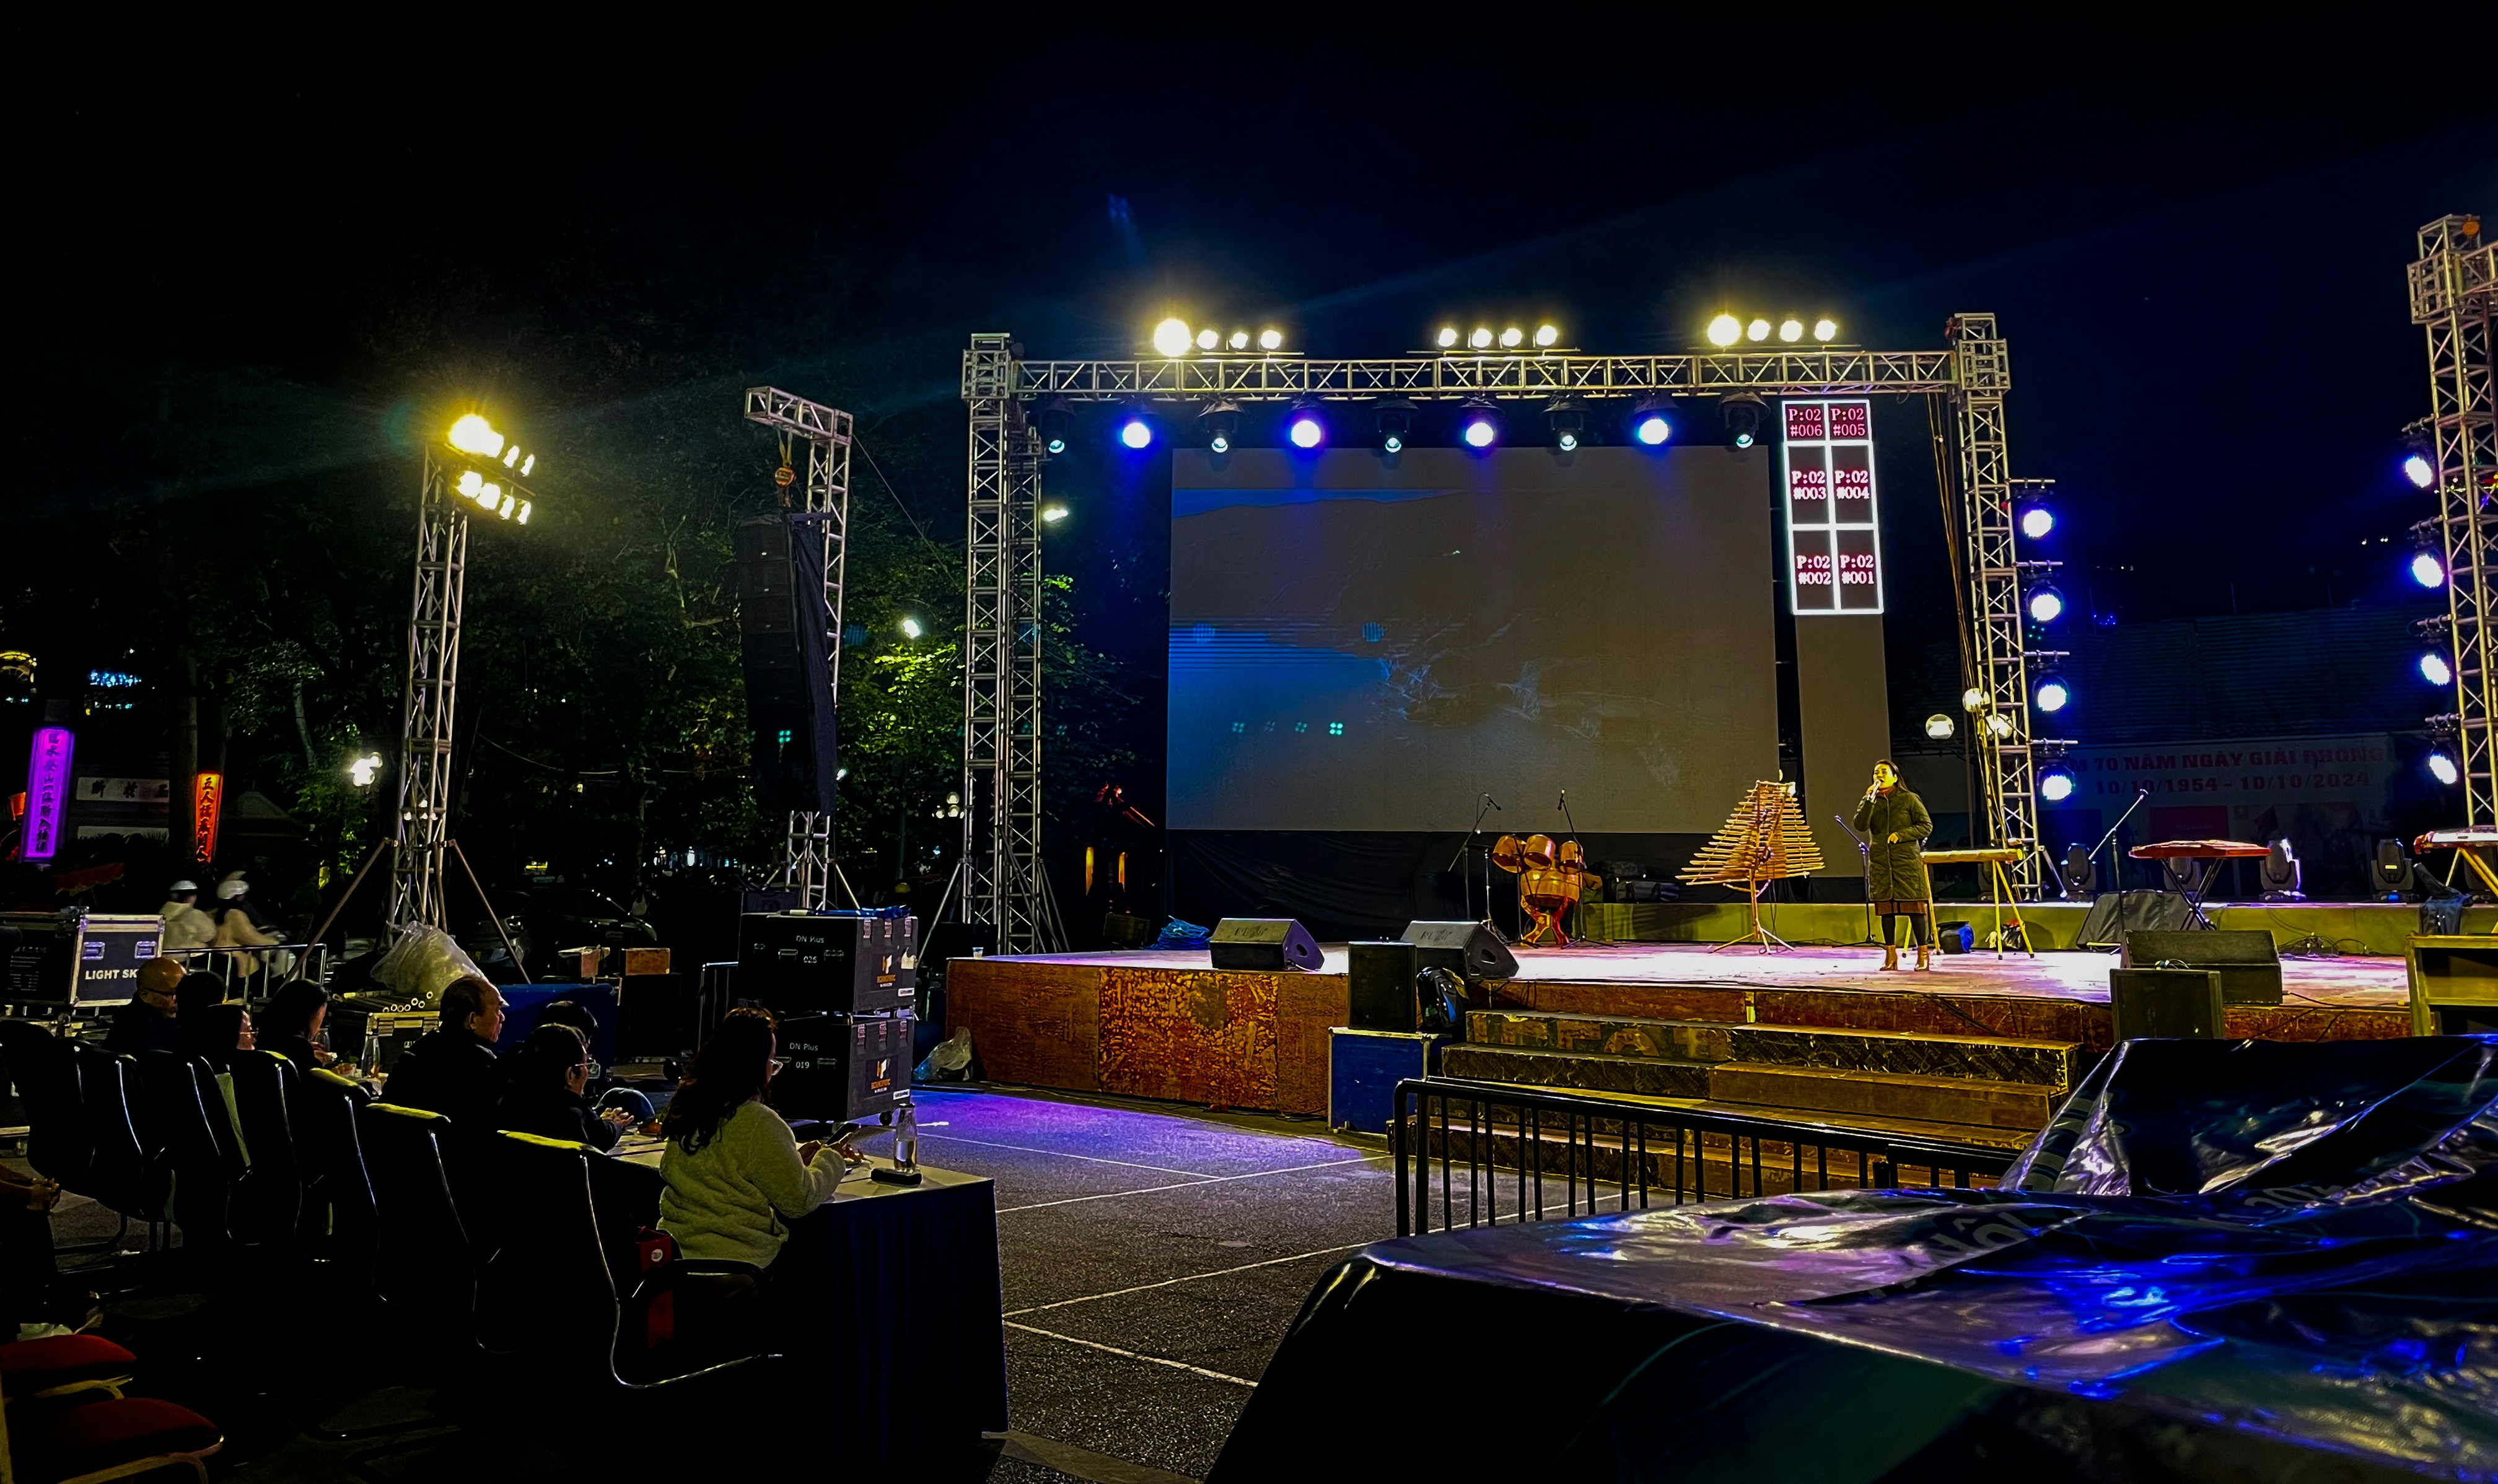
Main PA speakers are the primary loudspeakers responsible for delivering sound to the audience. The goal is to provide even, consistent coverage so that a listener in the front row and a listener in the back row have a similar, high-quality audio experience. The two most common types of main speaker systems are point source and line array.
Point Source Speakers Point source systems are what most people picture when they think of a speaker. Sound radiates from a single box, or a small cluster of boxes, designed to cover a specific area. They typically have a defined horizontal and vertical dispersion pattern (e.g., 90° x 60°).
- Best Use Cases: Point source speakers are ideal for smaller to medium-sized venues like clubs, houses of worship, corporate events, and small outdoor gatherings.
- Advantages: They are generally simpler to set up, more affordable, and can provide a very natural sound image since the audio originates from a single point.
- Limitations: In large venues, using multiple point source boxes to cover a wide area can cause interference and uneven coverage. Sound also dissipates more quickly over distance compared to a line array.
Line Array Speakers A line array system consists of multiple identical speaker cabinets stacked vertically in a line. By using complex physics and processing, these individual elements work together to create a single, coherent wavefront. This allows for precise control over the sound's dispersion pattern.
- Best Use Cases: Line arrays are the standard for large-scale events like concerts, festivals, and large auditoriums. They are essential for venues with long "throws" (distances from the stage to the back of the audience).
- Advantages: They provide highly controlled and even coverage over long distances. The volume level drops off much more slowly with distance, resulting in more consistent sound pressure levels (SPL) from the front to the back of the audience area. Their vertical dispersion can be tightly controlled to avoid sending unwanted sound reflections off ceilings. Professional stage line array speakers from brands like Sinbosen are designed specifically for these demanding applications.
- Limitations: Line arrays are more complex to design and deploy, requiring specialized knowledge for proper setup and "flying" (suspending from rigging). They also represent a significantly higher investment.
Many large productions use a hybrid system, employing a main line array for long-distance coverage and smaller point source speakers for front-fill (covering the first few rows) or delay-fill (for areas under balconies).
Subwoofers: Adding Depth and Impact with Bass
While main PA speakers are designed to cover the mid and high frequencies, most struggle to reproduce the very lowest end of the audio spectrum with power and clarity. This is where subwoofers come in. A subwoofer is a specialized loudspeaker designed exclusively to reproduce low-pitched audio frequencies, typically from around 20 Hz to 100 Hz. For any event featuring music, from a DJ set to a live band, subwoofers are essential for creating a full, rich, and impactful sound experience.
The benefits of adding subwoofers to a PA system are significant:
- Physical Impact: Subwoofers produce the "chest-thumping" bass that makes music feel powerful and energetic. They allow the audience to not just hear the music, but to feel it.
- Revealing Hidden Content: Many instruments, like kick drums, bass guitars, and synthesizers, have fundamental notes in the low-frequency range that most main speakers cannot accurately reproduce. A subwoofer reveals these hidden layers of sound, presenting the music as the artist intended.
- Increased Headroom for Main Speakers: By offloading the demanding task of bass reproduction to a dedicated subwoofer, the main speakers are freed up to focus on the midrange and high frequencies. This allows the entire system to play louder with greater clarity and less distortion.
Like main speakers, subwoofers are available in active (powered) and passive varieties.
- Active Subwoofers: These have a built-in amplifier, making them an all-in-one, plug-and-play solution. They are popular for mobile setups and smaller events due to their simplicity and quick setup.
- Passive Subwoofers: These require an external power amplifier. While they add an extra component to the system, they offer greater flexibility for larger, more complex, or permanently installed systems.
For professional applications, powerful subwoofers are a must. Brands like Sinbosen offer high-power active and passive subwoofers, including large-format models with 18-inch or 21-inch drivers, designed to deliver the deep, powerful bass required for large concerts and events.
Proper placement is key to getting the best performance from your subwoofers. Placing them on the ground in the center of the stage or in clusters on either side can help provide smooth and even bass coverage throughout the venue.
Stage Monitors: Helping Performers Hear Themselves Clearly
While the main PA system is aimed at the audience, there is another crucial speaker system on stage pointed in the opposite direction: the stage monitors. The purpose of a monitor system is to allow the performers to hear themselves and each other clearly. In a loud stage environment, it's impossible for musicians and vocalists to rely on the sound reflecting back from the main speakers. A dedicated monitor mix is essential for them to stay in time, in tune, and deliver a tight, confident performance.
There are two primary types of stage monitors:
Wedge Monitors These are the most common type of stage monitor. They are speaker cabinets with an angled shape that allows them to sit on the stage floor and project sound up towards the performer.
- How They Work: Each performer or small group of performers can have their own wedge monitor with a customized mix. For example, the lead vocalist's monitor might have a mix that is heavy on their own voice, while the guitarist's monitor might prioritize their guitar and the drums.
- Advantages: They are reliable, provide a powerful and direct sound source, and allow performers to feel the music physically on stage. They are a staple of live music venues everywhere.
- Disadvantages: A stage full of wedges can contribute to the overall volume on stage, which can sometimes "bleed" into the main PA mix and make it harder for the front-of-house engineer to create a clean mix for the audience. They can also be prone to feedback if a microphone is pointed too close to them.
In-Ear Monitors (IEMs) IEMs are a more modern solution, where performers wear small, custom-molded earpieces similar to high-fidelity earbuds.
- How They Work: A wireless transmitter sends a personalized monitor mix directly to a receiver pack worn by the performer, which then feeds the sound to their earpieces.
- Advantages: IEMs provide crystal-clear, studio-quality sound directly to the performer's ears, isolating them from the loud ambient stage noise. This results in much lower stage volume, allows for more complex and detailed monitor mixes, and protects the performers' hearing. It also gives the front-of-house engineer much more control over the audience mix.
- Disadvantages: Some performers feel disconnected from the audience and the "energy" of the room when using IEMs. They are also more expensive and complex to set up than traditional wedges.
Many large tours use a combination of both, providing IEMs for key performers and using wedges or larger "sidefill" speakers to add some physical impact and energy back to the stage.
Designing Your High-Performance Audio System for Any Stage or Event
Creating a flawless audio experience goes beyond just having the right components; it requires thoughtful system design. This means tailoring your setup to the unique characteristics of your venue and audience, strategically placing speakers for optimal sound, and ensuring all connections are solid and correct. A well-designed system ensures that the high-quality components you've chosen can perform to their full potential.
Matching Your System to the Venue and Audience
The single biggest factor influencing your PA system requirements is the environment itself. A system that sounds perfect in a small, quiet room will be completely inadequate for a large outdoor festival. Careful consideration of the venue size and expected audience count is the first and most critical step in system design.
Understanding Venue Size: From Small Rooms to Large Stadiums
The physical characteristics of a venue dictate the type and scale of the audio system required. Sound behaves differently based on the size of the space, the materials of the surfaces (walls, floors, ceilings), and whether the event is indoors or outdoors.
Small Rooms & Intimate Venues (Up to 150 people) For small indoor events like corporate meetings, private parties, or coffee shop gigs, the challenges are usually manageable.
- System Choice: A pair of high-quality 10-inch or 12-inch point source speakers on stands is often sufficient. For simple presentations, a compact, all-in-one portable PA system can be a great solution. If music is involved, adding a single subwoofer can significantly enhance the experience.
- Acoustic Considerations: In small, enclosed spaces, sound reflections can be a problem. Hard surfaces like glass, concrete, and bare walls will cause sound to bounce around, which can lead to muddiness and a lack of clarity. However, the presence of an audience, carpeting, and curtains helps absorb these reflections. The goal is controlled coverage, not overwhelming volume.
Medium Venues (150-500 people) This category includes larger function halls, small theaters, clubs, and many wedding receptions. The system needs more power and better coverage to reach everyone clearly.
- System Choice: A more powerful point source system is typically needed, often featuring 12-inch or 15-inch main speakers paired with one or two subwoofers to provide robust low-end for music. A more capable mixing console with 8 to 12 channels will be necessary for small bands or panel discussions.
- Acoustic Considerations: As rooms get larger and ceiling heights increase, controlling reverberation becomes more important. Sound needs to be projected further, so speakers with higher power and a more focused dispersion pattern are beneficial.
Large Venues & Stadiums (500+ people) For large concert halls, arenas, stadiums, and outdoor festivals, the audio challenges multiply significantly.
- System Choice: This is the domain of the line array. Large, flown line array systems are required to project clear, powerful sound over long distances with even coverage. These are almost always paired with large arrays of powerful subwoofers. For very deep venues, "delay towers" or additional sets of speakers are placed partway back in the audience to reinforce the sound for those far from the stage.
- Acoustic Considerations: Outdoors, there are no surfaces for sound to reflect off, which means sound dissipates quickly and more power is needed to achieve the desired volume. In large indoor spaces like arenas, long reverberation times and echoes are the main enemy. These echoes can blur the sound and make speech unintelligible. The highly controlled dispersion of a line array is critical for directing sound at the audience and away from reflective surfaces like walls and ceilings. Designing a system for such a venue is a complex task that requires professional expertise and acoustic modeling software.
| Venue Size | Typical Audience | Recommended Speaker System | Key Challenges |
|---|---|---|---|
| Small Room | < 150 | Pair of 10-12" point source speakers, maybe one sub | Managing reflections, avoiding excessive volume |
| Medium Venue | 150 - 500 | Pair of 12-15" point source speakers with subwoofers | Achieving even coverage, projecting sound further |
| Large Venue | 500 - 2,000 | Small to medium line array with multiple subwoofers | Controlling reverberation, long-distance projection |
| Stadium/Festival | 2,000+ | Large-format line array with extensive subwoofer arrays and delay towers | Overcoming sound dissipation (outdoors), managing extreme echoes and delay (indoors) |
Counting Your Audience: Ensuring Optimal Coverage
Just as important as the venue's physical size is the number of people who will fill it. The size of the audience directly impacts how much power and coverage you'll need.
Audience as Sound Absorbers: Human bodies are very effective at absorbing sound energy, particularly mid and high frequencies. An empty room will sound very different from a room packed with people. As more people fill a space, you need more power to overcome this absorption and ensure the sound remains clear and present, especially for those at the back.
Watts-Per-Person: A Rough Guideline: While not a perfect science, audio professionals sometimes use a "watts-per-person" rule of thumb to estimate power needs. This is highly dependent on the type of event and whether it's indoors or outdoors.
- Speech-based events: Might require 3-5 watts per person.
- Music-heavy events: Often require 10-15 watts per person, or even more for very loud genres. For example, a conference for 200 people might be well-served by a 1000-watt system, while a live band playing to the same number of people would likely need a system of 2000-3000 watts or more to provide adequate headroom and impact.
Scaling Your System: Thinking about your audience size helps you scale your system appropriately:
- Up to 50 People: A compact, portable PA system or a pair of 8-10 inch speakers is typically sufficient.
- 50-200 People: This usually calls for a more robust system with a pair of 12-inch speakers and at least one subwoofer if music is central to the event.
- 200-500 People: You'll need a powerful system, perhaps with 15-inch tops and multiple subwoofers, to deliver clean sound with enough headroom.
- 500+ People: This is where line array systems become essential. The number of speakers (or "boxes") in the array will be determined by the size and shape of the audience area to ensure everyone is covered.
Choosing a system that is "just enough" for your estimated crowd size is a common mistake. A system working at its maximum limit will sound strained and distorted. It's always better to have more power than you need (headroom) to ensure the audio remains clean, dynamic, and effortless, even during the loudest moments.
Strategic Placement: Speakers and Monitors for Best Sound
Where you place your speakers is just as important as which speakers you choose. Even the most expensive, high-performance audio system will sound poor if the speakers are placed incorrectly. The goal of strategic placement is to achieve consistent, clear coverage for the entire audience while minimizing negative acoustic interactions like feedback and unwanted reflections.
Speaker Placement Tips: Getting Sound to Every Corner
Proper speaker placement is an art and a science. The objective is to deliver direct, clear sound to as much of the audience as possible, creating an even listening experience everywhere in the venue. Here are some fundamental tips for positioning your main PA speakers.
Height is Your Friend: The tweeters (high-frequency drivers) of your main speakers should always be positioned above the heads of the audience. A good rule of thumb is to place them on stands so they are at least at ear level or slightly higher. This simple step does two crucial things: it prevents the front rows of the audience from absorbing all the high-frequency sound, and it helps the sound travel further to the back of the room. Think of it like a flashlight: raising it higher allows the beam to cover more ground.
Position in Front of Microphones: To prevent feedback (the high-pitched squeal that occurs when a microphone picks up its own amplified signal), the main PA speakers must always be placed in front of the microphones. The speakers should be pointed away from the performers and towards the audience. This creates separation between the sound being captured and the sound being amplified.
Create a Stereo Image with Proper Spacing: For a typical two-speaker setup, place one speaker on each side of the stage. The distance between them should be wide enough to create a sense of stereo separation for the audience, but not so wide that it creates a "hole" in the middle of the sound field. Imagine an equilateral triangle, with the two speakers forming two points and the ideal listening position (usually the sound booth) forming the third.
Angle Speakers Inward ("Toe-In"): Instead of pointing the speakers straight ahead, it's often beneficial to angle them slightly inward toward the center of the audience area. This technique helps to create a wider and more consistent stereo field, reducing the "dead zone" that can occur in the center front rows and ensuring more listeners hear a proper blend of both the left and right channels. By angling the speakers inward by about 25 degrees, for example, the coverage patterns will overlap more effectively across a larger portion of the venue.
Avoid Walls and Corners: Placing speakers directly against a wall or in a corner will artificially boost the bass frequencies, which can result in a boomy, muddy, and unbalanced sound. It's best to keep speakers at least two to three feet away from walls to minimize these unwanted reflections and boundary interference.
Use Fill Speakers for Awkward Areas: For wide stages or unusually shaped rooms, the main left and right speakers may not be able to cover everyone. This can create dead spots, particularly for audience members right in front of the stage or off to the far sides. In these cases, small additional speakers called "front fills" (placed on the lip of the stage) or "out fills" (aimed at the side sections) can be used at a low volume to gently fill in these coverage gaps and ensure no one is left out of the audio experience.
By following these fundamental placement strategies, you can dramatically improve the clarity, coverage, and overall impact of your high-performance audio system, no matter the quality of the components.
Making the Right Connections: Cables and Signal Flow
A high-performance audio system is only as strong as its weakest link, and often that weak link is the cabling. Choosing the right cables and understanding the path the audio signal takes—from the microphone to the mixer to the amplifiers and speakers—is crucial for maintaining signal integrity and preventing noise. Properly managing your cables not only ensures a clean sound but also contributes to the safety and professionalism of your setup.
Balanced vs. Unbalanced: Protecting Your Signal from Noise
Audio cables can be broadly divided into two categories: balanced and unbalanced. The difference is crucial, especially when running cables over long distances, as is common in stage and event production.
Unbalanced Cables An unbalanced cable uses two wires: a signal wire and a ground wire. The ground wire acts as a reference for the signal and also provides some shielding from outside interference.
- Connectors: The most common unbalanced connectors are TS (Tip-Sleeve), used for instruments like guitars and keyboards, and RCA connectors, found on DJ gear and consumer electronics.
- The Problem: The ground wire in an unbalanced cable can also act like an antenna, picking up electromagnetic interference (EMI) from sources like power cables, lighting dimmers, and cell phones. This interference is heard as an audible hum, buzz, or static.
- Best Use: Because of their susceptibility to noise, unbalanced cables should be kept as short as possible, ideally under 15-20 feet (about 4-6 meters). They are perfectly fine for short-run connections, like a guitar to a pedalboard or a keyboard to a nearby DI box.
Balanced Cables A balanced cable uses three wires: two signal wires and a separate ground wire. This clever design is the professional standard for rejecting noise.
- Connectors: The most common balanced connectors are XLR (used for microphones and connecting professional gear) and TRS (Tip-Ring-Sleeve), which looks like a standard guitar plug but has an extra "ring" on the connector.
- How it Works: A balanced connection sends two copies of the audio signal down the two signal wires. One copy is normal, and the other is polarity-inverted (flipped 180 degrees). As the cable travels, it picks up the same noise on both signal wires. When the signal reaches the destination (e.g., the mixing console), the receiving equipment flips the inverted copy back to its original polarity. When this happens, the two identical noise signals are now perfectly out of phase with each other and cancel each other out, a process called "common-mode rejection." The two clean audio signals, now back in phase, combine and become stronger.
- Best Use: Balanced cables are essential for any long cable run. All microphone cables use a balanced connection, which is why a 100-foot microphone cable can deliver a clean signal. It is the standard for connecting mixers, amplifiers, and all professional line-level equipment on a stage.
In short: always use balanced cables (XLR or TRS) for microphones and for any line-level signal that needs to run more than a few feet. Use unbalanced cables only for short instrument connections where necessary.

Stereo vs. Mono for Keyboards: When Detail Matters
Modern keyboards and digital pianos often feature rich, complex sounds that are created in stereo. This includes detailed piano samples and effects like chorus, reverb, and ping-pong delays that pan from left to right. This raises a common question in live sound: should you run keyboards in stereo or mono?
The Case for Stereo Running a keyboard in stereo means using two separate outputs (Left and Right) from the keyboard, connecting them to two separate channels on the mixing console, and panning those channels hard left and right.
- Benefit: This preserves the full quality of the keyboard's sound design. A grand piano patch will sound wider and more realistic, and stereo effects will be heard as intended, creating a more immersive and detailed sound. For the keyboardist (especially if using in-ear monitors) and for audience members in the "sweet spot" between the two main speakers, the experience can be significantly better.
- When to Use It: Stereo is best for situations where sonic detail is a high priority and the venue allows for a good stereo image. This could be in a recording, a live stream, or in venues where the audience is situated well within the coverage of both left and right speakers.
The Case for Mono Running a keyboard in mono involves taking a single output from the keyboard (usually the one labeled "L/Mono") and connecting it to a single channel on the mixer.
- Benefit: Simplicity and consistency. For the vast majority of a live audience, who are not sitting in the perfect stereo sweet spot, a mono signal provides a more consistent listening experience. Someone sitting on the far-left side of the venue won't miss the parts of a keyboard patch that are panned to the right. Mixing in mono also forces the sound engineer to make sure the keyboard sound sits well in the mix without relying on panning to create space, which often results in a more solid and punchy mix overall.
- When to Use It: Mono is the practical and often preferred choice for most live events. It saves channels on the mixing console, is simpler to set up, and guarantees that everyone in the audience hears the entire keyboard part, regardless of where they are located. Most PA systems in clubs, churches, and smaller venues are run in mono for this very reason.
Important Note: If you must run a stereo keyboard in mono, it is crucial to use the designated "L/Mono" output. Simply combining the left and right outputs with a Y-cable can cause phase cancellation, which can make the sound thin, weak, or cause certain frequencies to disappear entirely. Most keyboards are designed to properly sum the stereo signal to mono when only the L/Mono jack is used.
Ultimately, while stereo can be a fantastic "nice-to-have" for detail, mono is the reliable workhorse for live sound, ensuring a consistent and powerful mix for the entire audience.
Mastering the Mix and Troubleshooting for Flawless High-Performance Audio
Setting up the gear is only half the battle. The true art of high-performance audio lies in mastering the mix and being prepared to troubleshoot any issues that arise. A skilled sound engineer can make a modest system sound incredible, while a poor mix can ruin the potential of even the most expensive equipment. This final section focuses on the practical steps to ensure your event sounds flawless from the first note to the final applause.
The All-Important Sound Check: Your Blueprint for Success
The sound check is arguably the most critical part of any live event. It is the dedicated time before the audience arrives to test every component of the system, set initial levels, and build the foundation for a great mix. Rushing or skipping a sound check is a recipe for disaster. A thorough and systematic approach is key.
Step-by-Step Sound Check: From Mics to Monitors
A professional sound check follows a logical order to build the mix from the ground up, ensuring each element has its place before adding the next. While every engineer has their own workflow, a common and effective procedure looks like this:
1. Preparation and Line Check (Before the Performers Play) Before the band even touches their instruments, the technical crew should perform a line check. This involves:
- Verifying all connections: Confirm that every microphone and DI box is patched into the correct channel on the mixing console.
- Testing for signal: Tap each microphone and check each instrument line to ensure a clean signal is reaching the board. This is where you'll catch bad cables, faulty mics, or patching errors before they become a major headache.
- Setting up talkback mics: Ensure there's a clear line of communication between the front-of-house (FOH) engineer and the monitor engineer/performers on stage.
2. Building the Foundation: The Rhythm Section Most engineers start building the mix with the core of the band's rhythm.
- Drums: Start with the kick drum. Have the drummer play it consistently while you set the gain, apply any initial EQ (to add punch or remove boxiness), and use a noise gate to tighten up the sound. Move on to the snare, then the hi-hats, toms, and finally the overheads, checking each one in isolation before having the drummer play a basic groove.
- Bass: Once the drums have a solid foundation, bring in the bass guitar. Check the signal from the DI box and/or bass amp microphone. Focus on getting the kick drum and bass to work together, as this relationship is the heartbeat of the mix.
3. Adding the Harmony and Melody: Guitars and Keys With the rhythm section locked in, it's time to layer in the other instruments.
- Have the guitarists and keyboard players play one at a time. Set their gain levels and apply subtractive EQ to carve out space for them in the mix, ensuring they don't clash with each other or the bass.
- If a player uses multiple sounds (e.g., a keyboardist with different patches, or a guitarist switching between clean and distorted tones), it's crucial to check the levels for each one to ensure consistency.
4. The Focal Point: Vocals Vocals are almost always the most important element of the mix, so they are often checked last in FOH but first for monitors.
- Lead Vocals: Have the lead singer sing a verse and chorus of a song at a typical performance volume. This is critical for setting the correct gain and compression to ensure the vocal sits clearly on top of the instrument mix without being drowned out or becoming harsh.
- Backing Vocals: Bring in the backing vocalists one by one, then have them sing together to balance their blend and ensure they support the lead vocal without overpowering it.
5. Setting the Monitor Mixes While the FOH engineer is building the main mix, the monitor engineer (or the FOH engineer in smaller setups) is building individual mixes for each performer.
- This process often happens in parallel. A common approach is to dial in a monitor mix for each musician as their instrument is being checked.
- Start by asking the drummer what they need to hear, then move to the bassist, and so on. Most performers will want a strong signal of their own instrument/voice, along with key rhythmic and melodic elements from the rest of the band to stay in time and in tune.
6. The Full Band Run-Through Once all individual elements are checked, have the band play one or two of their loudest and most dynamic songs. This is the final and most important step, allowing the engineer to:
- Make final adjustments to the overall balance.
- Fine-tune EQs and compressors in the context of the full mix.
- Check that monitor mixes are working for all performers when playing together.
- Set and audition effects like reverb and delay.
A successful sound check requires good communication, patience, and a systematic approach. It ensures technical issues are resolved early and allows the engineer to start the show with a mix that is already 90% of the way there.
Balancing the Sound: Tips for a Harmonious Mix
With gain stages set and everything working, the creative part of mixing begins. Balancing the sound isn't just about setting volume levels; it's about creating space for each instrument so the audience can hear every part clearly. A good mix is one where all the elements work together to serve the song.
Prioritizing Vocals and Instruments for Clarity
At its core, mixing is about creating a hierarchy. Some elements need to be front and center, while others serve a supporting role. In most popular music and public speaking events, the human voice is the most important element.
Vocals First: A common mixing philosophy is "vocals win." The lyrics or speech must be clear and intelligible at all times. A good practice is to bring the vocal fader up to the desired level first, and then build the rest of the mix around it. If the vocals are getting lost, it's often better to turn something else down rather than just turning the vocals up.
Creating Sonic Space with EQ: Equalization (EQ) is your most powerful tool for creating clarity. Instead of simply boosting frequencies to make something louder, think about cutting frequencies from one instrument to make space for another. This is called "subtractive EQ."
- For example, if the vocals and an electric guitar are competing in the midrange (a common problem), try making a small cut in the guitar's EQ in the 1-3 kHz range. This can create a "pocket" for the vocal to sit in, making it instantly clearer without significantly changing the guitar's tone.
- Use a high-pass filter (HPF) on every channel that doesn't need deep bass, especially vocals. This removes low-frequency rumble and mud, cleaning up the entire mix and leaving more room for the kick drum and bass guitar.
The Foundational Relationship: Kick and Bass: After the vocals, the relationship between the kick drum and the bass guitar is the most important for creating a powerful and cohesive rhythm section. These two instruments should be balanced so they are distinct but work as a single unit. If they are fighting for the same low-frequency space, the bottom end of your mix will sound muddy and undefined.
Layering the Mix: Once the vocals and foundation are set, you can layer in the other elements. Rhythm instruments like guitars and keyboards should provide the harmonic structure, while lead instruments or solos should be brought forward when it's their moment to shine. Think of the mix in terms of depth: vocals in front, rhythm section right behind them, and other supporting elements and effects filling out the background. Walking the room during the show to hear what the audience hears in different spots is crucial for making sure your mix translates well everywhere.
Using Compressors and Effects Wisely to Enhance Sound
Compression and effects like reverb and delay are the secret ingredients that can take a good mix and make it sound polished, professional, and exciting. However, they must be used with taste and intention.
Compression: Taming Dynamics for Consistency A compressor is a tool that reduces the dynamic range of a signal—making the quiet parts louder and the loud parts quieter.
- On Vocals: Compression is essential for live vocals. A singer's volume can change dramatically from a soft whisper to a loud belt. A compressor helps to smooth out these variations, ensuring that every word can be heard clearly without the engineer having to constantly "ride the fader." A setting with a ratio of around 3:1 or 4:1 is a good starting point for most vocalists.
- On Instruments: Compression can also be used to tighten up the sound of instruments like the kick drum and snare, giving them more punch and consistency. It can also help a bass guitar sit more evenly in the mix. The key is to be subtle; over-compression can suck the life and energy out of a performance.
Effects: Creating Depth and Space Effects like reverb and delay help to place the instruments and vocals in a believable acoustic space, adding depth and dimension to the mix.
- Reverb: Reverb simulates the sound of a room. A short, subtle plate reverb can add a bit of warmth and brightness to a vocal without pushing it to the back of the mix. A longer, hall-style reverb can create a sense of drama and space, but should be used sparingly on lead vocals to maintain clarity.
- Delay: Delay, or echo, can be used to add thickness and texture. A very short "slapback" delay can make a vocal sound thicker and more present. A longer delay timed to the tempo of the song (like a quarter-note or eighth-note delay) can be used as a more noticeable creative effect, often on specific words or phrases.
- Keep it Subtle: For live sound, effects should generally be "felt more than heard." The goal is to enhance the sound, not to overwhelm it. Too much reverb will make your mix sound distant and muddy. It's also a good practice to use an EQ on your effect returns to roll off low frequencies, which helps prevent them from clouding the mix.
By carefully applying EQ, compression, and effects, you can transform a static balance of instruments into a dynamic, engaging, and professional-sounding mix.
Preventing Common PA System Headaches
Even with the best equipment and a perfect mix, things can go wrong. Live events are unpredictable, but with careful preparation and troubleshooting knowledge, you can prevent common PA system headaches before they derail your show. Focusing on signal integrity, power safety, and regular maintenance is key to a smooth, stress-free event.
Tackling Noise Issues and Signal Dropouts
Unwanted noise and signal interruptions are two of the most common and frustrating problems in live audio. Fortunately, most issues can be traced back to a few common culprits.
Identifying and Eliminating Hum and Buzz A persistent hum or buzz in the audio system is almost always an electrical issue, not a problem with the speakers or amplifiers themselves.
Ground Loops: The most common cause of a low-frequency hum (typically 50/60 Hz) is a "ground loop." This occurs when different pieces of audio equipment in a system are plugged into different electrical outlets that have slightly different ground potentials. This creates a loop for stray electrical current to flow through the audio cables' shielding, which is then amplified as hum.
- The Fix: The simplest solution is to plug all interconnected audio equipment (mixer, effects, amplifiers) into a single power outlet or a high-quality power conditioner. This ensures they all share a common ground, breaking the loop. If that's not practical, a "ground lift" switch on a DI box or a dedicated ground loop isolator can also be used to safely break the loop without creating a safety hazard. Never defeat the ground pin on a power cable, as this can create a dangerous shock risk.
Electromagnetic Interference (EMI/RFI): A higher-pitched buzz or "hash" is often caused by interference from other electrical devices.
- The Cause: Power cables, lighting dimmers, fluorescent lights, Wi-Fi routers, and even cell phones can radiate electromagnetic fields that get picked up by audio cables, especially unbalanced ones.
- The Fix: The first line of defense is proper cable management. Keep audio cables away from power cables, especially when running them in parallel. If they must cross, do so at a 90-degree angle to minimize interference. Using high-quality, well-shielded balanced cables (XLR/TRS) for all long runs is also crucial for rejecting this type of noise.
Preventing Wireless Signal Dropouts Wireless microphone dropouts are stressful, but most can be avoided with proper setup and best practices.
Antenna Placement is Key: The placement of your receiver antennas is the single most important factor in wireless reliability.
- Maintain Line of Sight: Ensure there is a clear, unobstructed line of sight between the transmitter (on the performer) and the receiver antennas. Human bodies, walls, and large metal objects are all obstacles that can block the signal.
- Get Antennas Close: The signal is strongest when the antennas are close to the transmitter. For best results, remotely mount your antennas near the stage rather than leaving them on a receiver in a rack far from the performance area.
- Proper Orientation: For typical diversity systems, position the two antennas at a 45-degree angle from each other (forming a "V" shape) to ensure good reception regardless of the transmitter's orientation.
Frequency Coordination: In today's crowded RF environment, you can't just turn on a wireless system and hope for the best.
- Scan for Clean Frequencies: Always use your receiver's built-in scan function to find a clear, open frequency at the venue before the show starts. If you are using multiple wireless systems, you need to use frequency coordination software (like Shure's Wireless Workbench) to calculate a set of compatible frequencies that won't interfere with each other.
- Avoid Interference: Be aware of other RF sources in the building, such as other wireless systems, Wi-Fi networks, and LED video walls, which can all cause interference.
Battery Management: A dead battery is the simplest cause of a dropout. Always start a show with fresh, high-quality batteries. Keep spares on hand for quick changes.
By systematically addressing these common issues, you can ensure a clean, reliable signal from start to finish.
Ensuring Power Safety and Secure Installation
Working with a high-performance audio system involves significant amounts of electricity. Power safety is not just about protecting your equipment; it's about protecting people from serious injury.
- Understand Your Power Needs: Before the event, calculate the total power draw of your entire system, including amplifiers, powered speakers, mixers, and any backline gear. Ensure the venue can provide enough dedicated circuits to handle this load without overloading. Overloaded circuits can trip breakers, shutting down your show, or worse, cause overheating and create a fire hazard.
- Use a Single Power Source: Whenever possible, connect all audio equipment to a single power distribution source. This helps prevent ground loops and ensures all components are on the same electrical phase.
- Power Sequencers and Conditioners: A power conditioner or sequencer is a wise investment. It provides surge protection and filters out noise from the AC line. A sequencer also powers up and powers down your gear in the correct order—amplifiers should always be the last thing turned on and the first thing turned off to prevent loud, damaging pops in the speakers.
- Safe Cable Runs: Never run audio and power cables parallel to each other over long distances, as this induces noise. If they must cross, do so at a 90-degree angle. In any area with foot traffic, cables must be secured properly to prevent tripping hazards. Use gaffer tape to tape cables down flat to the floor or, for high-traffic areas, use heavy-duty cable ramps or covers. Never run cables across a fire exit.
- Secure Your Speakers: Loudspeakers, especially large line array hangs or heavy point source boxes on stands, must be installed securely.
- Speaker Stands: Ensure tripod stands are on a level, stable surface and that the legs are spread wide enough to provide a solid base. Don't place heavy speakers on anything not designed to hold their weight.
- Flying Speakers: Suspending or "flying" speakers from trussing or ceiling points is a job for certified and experienced rigging professionals only. The weight loads are immense, and a failure can be catastrophic. Always follow manufacturer guidelines and venue regulations.
The Importance of Regular Maintenance and Cable Management
A well-organized and maintained system is a reliable system. Chaos breeds problems. Taking the time for proper maintenance and cable management pays dividends in reliability, safety, and efficiency.
Inspect Your Gear Regularly: Before and after every event, perform a visual inspection of all your equipment.
- Cables: Look for any signs of damage, such as cuts in the insulation, crushed jackets, or bent connector pins. A damaged cable can cause crackles, signal loss, or even short out equipment. A simple cable tester is an invaluable tool for quickly identifying faulty cables. Label any bad cables immediately and take them out of service for repair or disposal.
- Speakers and Amps: Clean dust from amplifier vents and speaker grilles to ensure proper cooling and performance. Check speaker cones for any visible damage.
- Connectors: Ensure all input and output jacks on your equipment are clean and secure.
Practice Good Cable Management: A messy stage is not just unprofessional; it's unsafe and inefficient.
- Label Everything: Label both ends of every cable. This simple step can save an immense amount of time during setup and troubleshooting. Color-coded cables or tape can also help quickly identify different signal types (e.g., mics, lines, speakers).
- Use the Right Length Cables: Use cables that are the appropriate length for the job. Excessively long cables just create a tangled mess on the stage floor, which is a major trip hazard and makes troubleshooting a nightmare.
- Create a System: Plan your cable runs. Establish clean pathways for cables, often along the back and front edges of the stage. Use cable ties (reusable Velcro wraps are best) to bundle parallel runs together neatly.
- Coil Cables Correctly: When the show is over, take the time to coil your cables properly using the "over-under" method. This prevents kinks and internal damage, dramatically extending the life of your cables and making your next setup much faster.
A clean, organized, and well-maintained audio system demonstrates professionalism and a commitment to safety. It allows you to focus on what truly matters: delivering a flawless, high-performance audio experience for the event.
Conclusion
Setting up high-performance audio for stages and events might seem like a complex undertaking, but with the right equipment and a solid understanding of the principles, you can create a truly unforgettable sound experience. Throughout this guide, we've emphasized that success hinges on careful planning, meticulous attention to detail, and the use of reliable, professional-grade gear.
We have journeyed through the entire audio signal chain, from the crucial choice of microphones to the power of digital mixers, the muscle of amplifiers, and the final delivery through strategically placed speakers. We've explored how to design a system tailored to your specific venue and audience, and we've covered the essential practices for mastering the mix and troubleshooting common problems to ensure a smooth, professional production.
From your microphones to your Sinbosen amplifiers and speakers, every component plays a vital role in achieving that perfect, high-performance sound. By keeping these principles and tips in mind, you are now well-equipped to tackle the challenges of live audio. You have the knowledge to deliver exceptional sound that elevates any performance and captivates any audience, ensuring that every stage you command and every event you produce sounds absolutely spectacular. Now, go out and make some noise—the right way